
How to show your images at their best
But images continue to one of the most common sources of problems for WordPress users.
It’s so easy to take a great photo and load it onto your site that before you know what’s happened, your Media Library is a confused jumble of images. And your page loads at the pace of a tired snail.
There are several factors that determine how images affect your website. In this article, we look at the most common pitfalls affecting WordPress users:
• Image size
• File size
• File quality
• File format
Each of these four attributes can and will influence how the image looks and affects your site. Let’s consider how they interact and what you can do to get the best results from your photo.
Image size
Image size is normally shown in pixels (px). While there is a relationship between image size, file size and quality it’s possible to have a large image, say 1200px * 1200px, that has a small file size. That’s often determined by its quality, which we’ll look at shortly.
When considering the optimum image size (as opposed to file size), consider where the photo will appear. All but the largest screens are unlikely to be more than 1600px wide. Most are smaller and when sidebars are taken into account, the available screen size for a full-width image may be as little as 900px or less. And if the image is not full width, it may only be displayed at 600px or much less.
That’s not to say you should only use small images. You need to factor in image quality. But there’s little point in loading a 1600px * 1600px image for use in a mid-page block that is only 600px * 600px in size.
Aspect Ratio
Aspect ratio – the ratio between width and height – is behind many problems on a WordPress page. If you’re going to populate a page with rows or columns of photos, try to use the same width/height for all related images.
For example, if you have a large project team and you want them to appear on a team page, make sure that the size is consistent for all the member photos. Use an image editor if necessary to resize or crop the image. Choose a size, perhaps 400px * 400px, and stick to it. If you don’t, your rows and columns are unlikely to line up nicely.
This applies anywhere you are using multiple images in close proximity, such as products in an e-commerce store or logos on a portfolio page. Some themes and plugins take care of this automatically but most don’t. Many websites end up looking unprofessional due to mismatched image sizes.
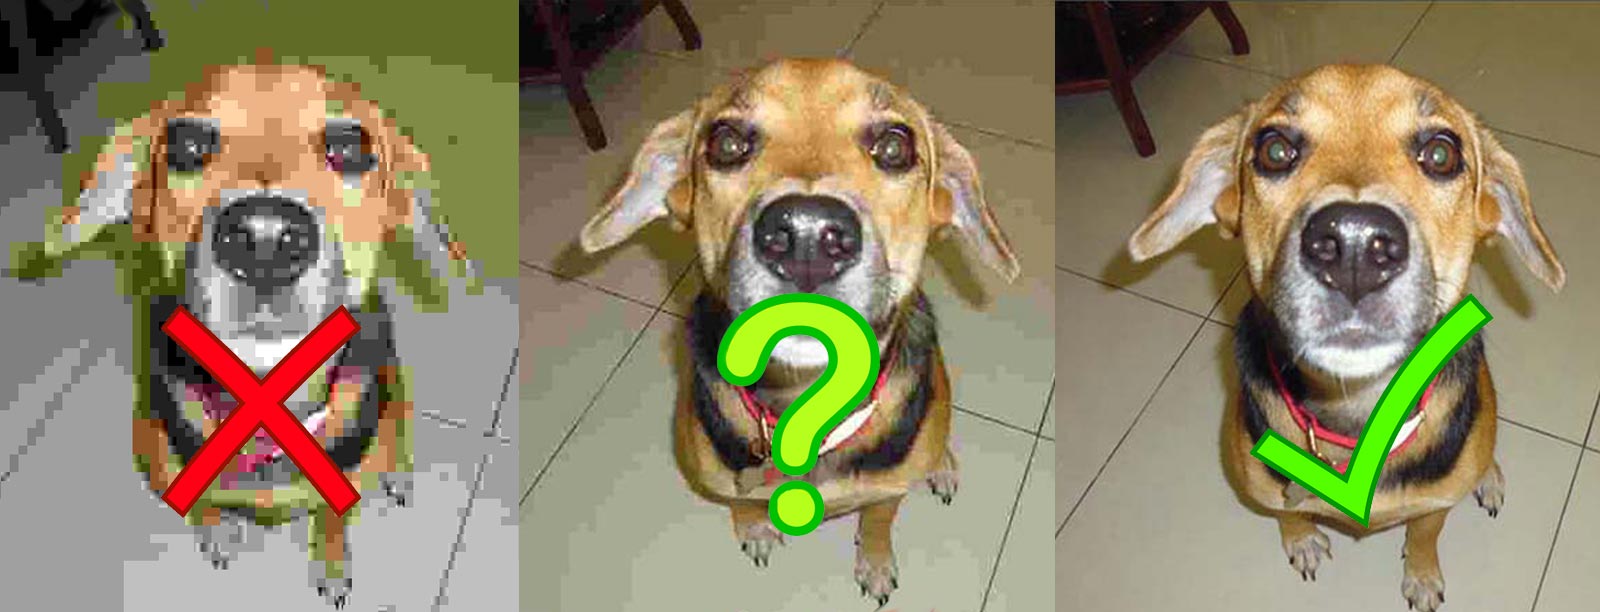
Image Quality
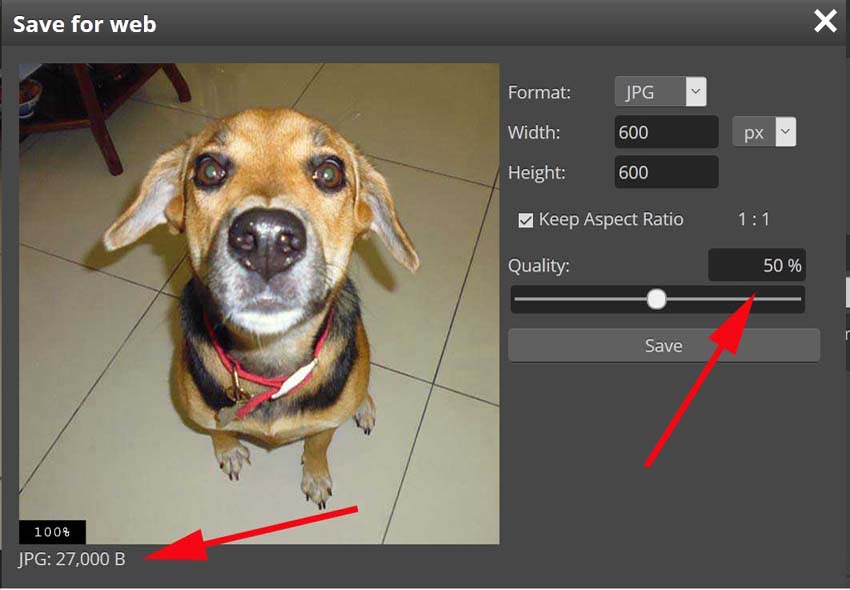
Image quality and size are the key components that determine file size. To keep the file size under control, inevitably there will be some hard decisions about how far to reduce image quality.
Fortunately, by using JPEGs you have the ability to compress images a long way before the loss of quality becomes noticeable. The human eye is, apparently, not that good at spotting image quality reduction!
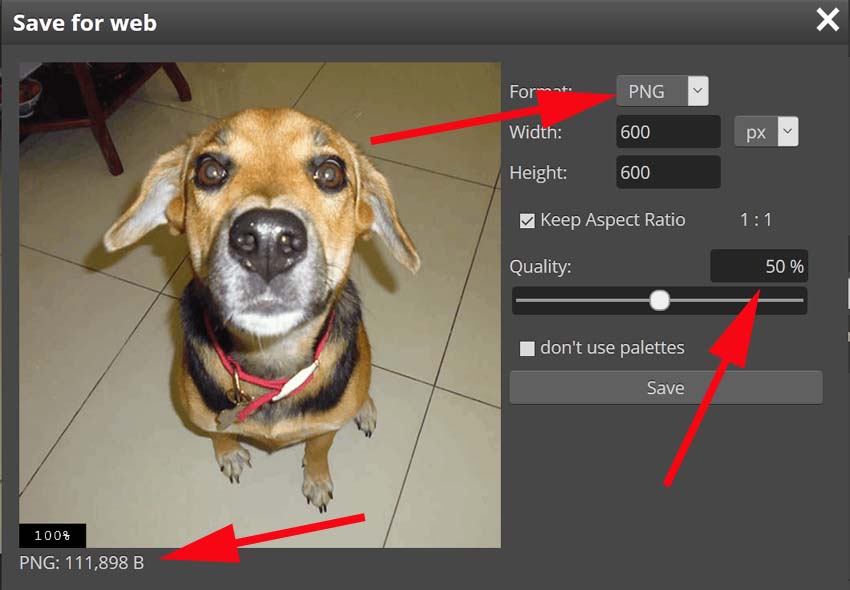
There are many image editing tools that can remove pixels from an image to reduce its size without the average viewer noticing. Photoshop is commonly used but others are available free on the Internet and do the same job.
WordPress itself compresses JPEGs to 90% of their original size, knowing that you won’t notice. While that’s a great start, free plugins like WP Smush do a better job at keeping your file sizes under control without hurting the quality. But they can only do so much. You should compress your images as far as practical before uploading them to the Media Library.
But don’t go too far:
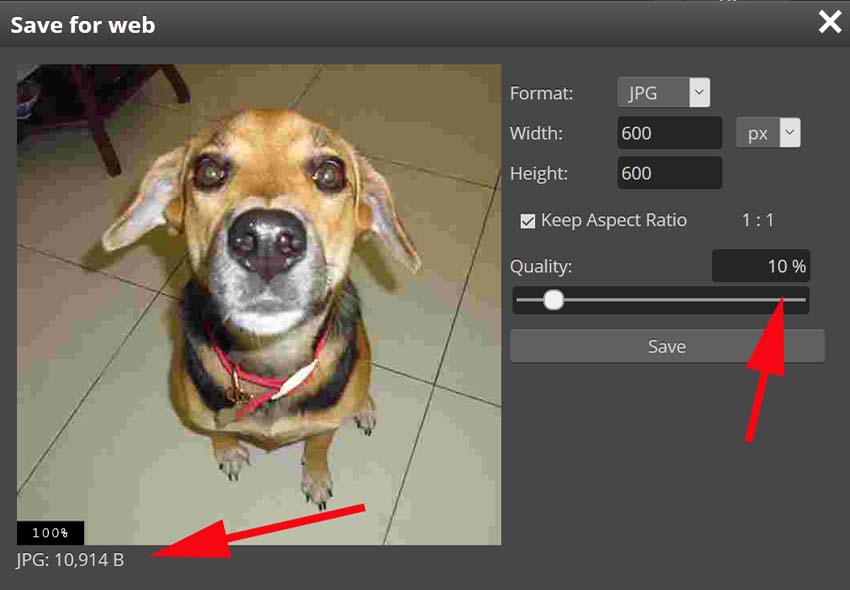
Don’t make the mistake of trying to use two compression tools on the same image – it will probably ruin the quality.
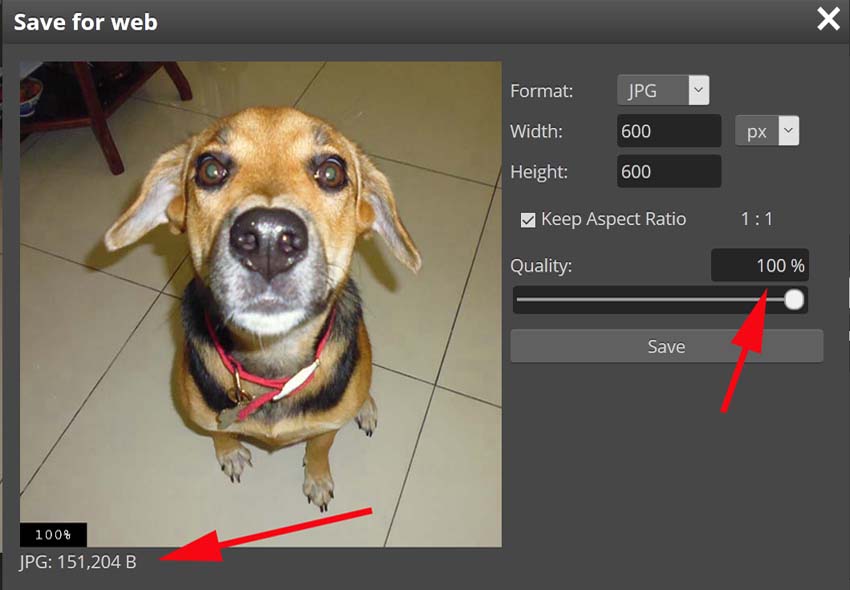
File Size
The file size is the end result of the image size and quality. Unfortunately, there is a compromise to be made, as large images slow your website down.
Most images on the web are between 30kb and 350kb. Large headers may be 500kb but bigger than that and your site is likely to load slowly.
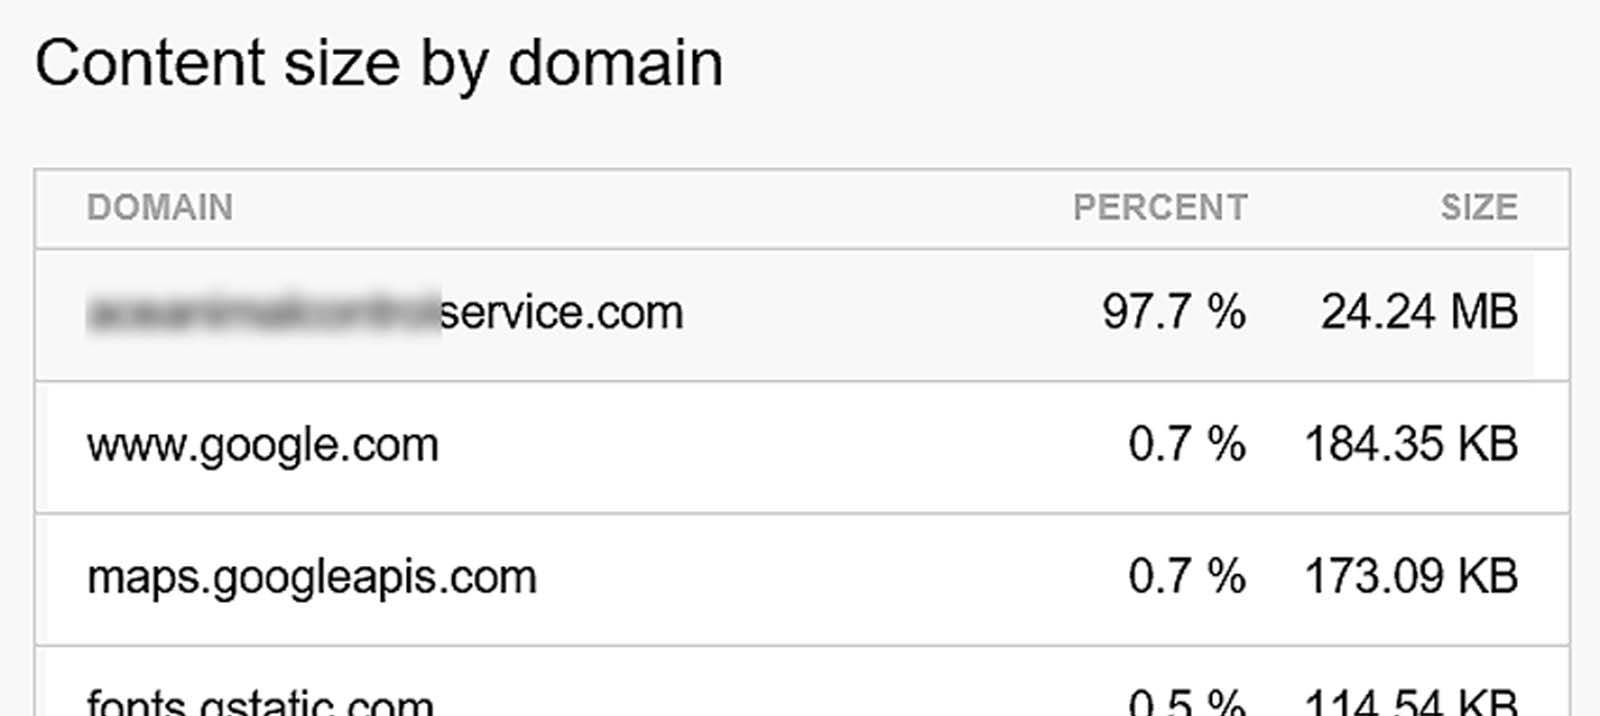
If you use Pingdom to check a website, it’s not uncommon to see images making up 90% of its home page size. And that’s often due to one or two unnecessarily huge photos.
The decision whether to reduce file size at the risk of quality, or suffer a slower load speed can be tough. But by understanding the relationship between the three main components, you should find a happy medium.
File Format
Three file formats are commonly used in WordPress for images. These are JPEG, PNG and GIF. Sadly, the wrong one is often used for the wrong reason. Such mistakes can have a big impact on the size of the webpage and its load speed.
For almost every image, you should use JPEG. The file size and range of colour is better than the other two formats for the equivalent image size. JPEG can also be compressed further without evident loss of quality.
PNG is ideal for logos, buttons or any image that needs transparency. If used for normal images, PNG will result in a larger file size with no resulting benefit.
GIF has a low range of colours but is ideal for small animated files, such as icons. But don’t overuse them as they can be larger than you expect.
If you have PNG or GIF images, consider converting them to JPEG and replacing them.
Good Practice
Even when they’re at their best looking and most optimized, images can still adversely affect your SEO ranking directly and indirectly. It’s not just about size and quality. The image metadata is important but often overlooked.
Alt Tags
For years, Google has been trying to enhance the user experience. Recently, it turned its attention to assist visually challenged users.
Due to poor eyesight, a friend of mine relies heavily on text readers when using the Internet. She finds it very frustrating when the text reader finds an image with no details – that is no Alt Tags.
To overcome this, Google has emphasized the importance of using Alt Tags on images. How much weight is given to these tags by the Google search engine algorithm is hard to say, but those who ignore them do so at their peril. Yet, a surprisingly large number of site owners do exactly that.
Add Alt Tags to all images on your website. It doesn’t take long. The text doesn’t have to be complicated but it should be relevant and explain what the image is about.
File Names
File names are also often overlooked. Many users upload images with names like shutterstock122345.jpg. This is a mistake for two reasons.
Google assigns SEO value to the content on a page. Let’s assume you’re writing a page about growing apples. Undoubtedly, you’ll ensure the word ‘apples’ and words related to apples will be scattered throughout the text for Google to find. You do this in the hope of boosting your SEO ranking.
What about the image file names? A file name like P20180505.jpg adds no value and Google treats it as such. However, a relevant file name like apples-on-tree.jpg will be noted and approved by the mighty Google bots.
Using meaningful file names has another benefit. This is especially important after you’ve uploaded dozens of images. You can use the search function in the Media Library to quickly find the one you need. Ask yourself – which will be easier to search for: P20180505.jpg or apples-on-tree.jpg?
Conclusion
You should never underestimate the importance of optimizing the images you upload onto your WordPress site. It doesn’t require any great skills. But the impact on your website can be profound.
Not only will visitors be impressed by the quality of your images but Google may boost your SEO ranking due to load speed, relevance and Alt Tags. Overall, a win-win situation.
Knowing how to post great images is one thing. But finding them and the right editing tools can be hard. Here are a few sites you can try:
Finding Free Images
The following websites are among a growing number that offer free-to-use non-copyrighted images:
pixabay.com
pexels.com
maxpixel.net
pxhere.com
Always check before downloading an image that it really is free-to-use as some so-called free sites have links to copyrighted material. You can also check Flickr and www.commons.wikimedia.org but their images are often subject to copyright.
Image Editing Tools
There are many free online image editing tools:
photopea.com (currently my favourite)
gimp.org/
pixlr.com/editor/
www169.lunapic.com/editor/